- Connect the RX100 receiver to the display using the power cable and HDMI cable. If the display does not have a Type-C port to support power more than 5V/2A, use the included switch cable to convert it into two USB-A connectors. One of the USB-A connectors should be USB3.0, which can supply power for the receiver. Alternatively, you can connect the Type-C cable to a power adapter (not included in the package).
- To connect a USB webcam, plug the camera’s USB cable into the USB-A port on the receiver.
- Mount the receiver RX100 on the display using the built-in mounting clip. Ensure that the receiver is positioned towards the front side for optimal wireless signal transmission. The optimal wireless transmission range is within 5 meters.
- Switch the display output source to the connected HDMI port.
- Connect the speakerphone ST100 to a full-featured Type-C port on your laptop. Wait until the screencasting button light turns green, then press the button to start casting your screen. Press the button again to pause screencasting. * In the case where the laptop’s type C port does not meet the full feature requirement, use the USB-C to HDMI & USB-A Adapter instead.
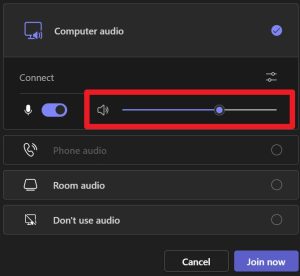
- To use the speakerphone ST100 and access the camera wirelessly, in your video conference software, select “Connect” as your microphone, speaker, and camera.
Not all laptops’ Type C port supports display signal. Furthermore, there could be compatibility issue among different manufacturers and models, resulting in such failure. A Type C to A and HDMI converter is included for user as an alternative instead. 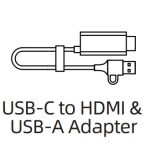
If your display lacks a USB-C port with more than 5V/2A output, you can connect the USB-C cable to a charger adapter (USB charger block) as an alternative.
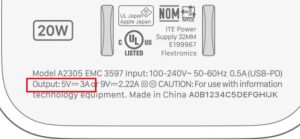
Please make sure to use an adapter with specification of 5V/2A or higher (Normally, USB C port will be on the charger block instead of USB A) to ensure adequate power supply to the receiver RX100. Otherwise the receiver RX100 may not function correctly. 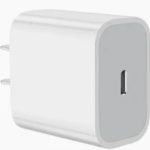
The Connect speaker (ST100) volume button only works on adjusting the system volume in Windows (currently not working with MAC), it does not change the speaker volume in some video conference softwares. Please use the video conference volume control in the software application to adjust volume.